Task In WebApp
To make it easier for Users to create tasks in our system, we have provided three convenient methods.
The first method involves creating tasks separately from the Tasks tab. By navigating to the Tasks module directly, users can easily create new tasks.
Users also have the advantage of setting reminders for tasks. These tasks can be seamlessly added to Leads and Opportunities, streamlining the workflow and ensuring efficient task management.
Furthermore, we offer two options for creating tasks, ensuring flexibility and convenience for users.
Furthermore, we offer two options for creating tasks, ensuring flexibility and convenience for users.
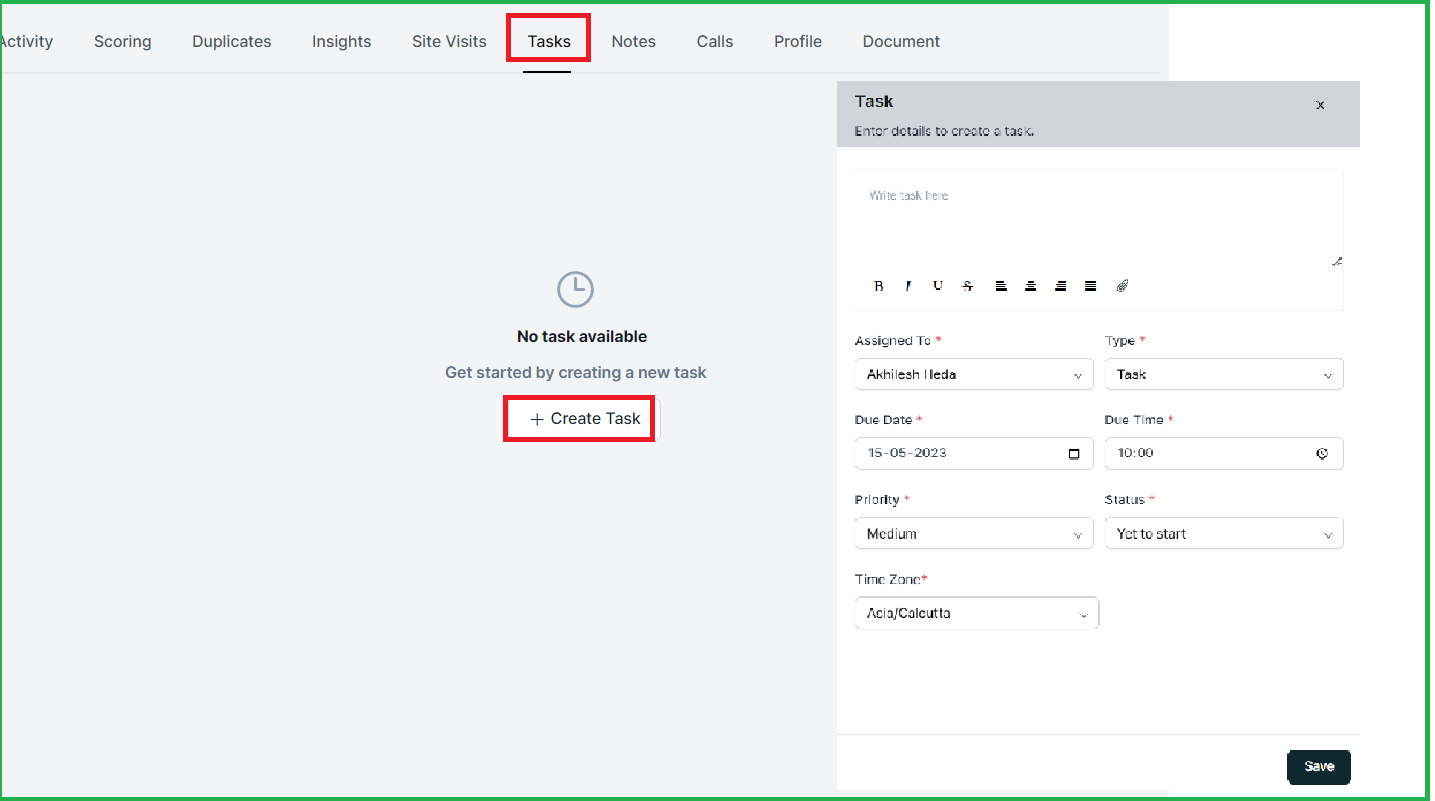
TASKS CREATION FROM LEADS AND OPPORTUNITIES PROFILE:
Under the Profile section, you can create tasks by navigating to the lead or opportunity profile and following these steps:
By doing so, a right panel will open, allowing you to create a task. You can assign the task to other team members or individuals within the organization. Additionally, this feature enables you to attach documents and photos to the task.

2. In this window, you can add the necessary details for the task.
These details include the Assignee's Name, Type of Task, Time, and Priority. Once you have provided the required information, you can save the task.
Task Management in calendar View.
- To access the task view and create new tasks from the calendar, users need to click on the calendar icon
 located in the top navigation bar.
 - Upon clicking the calendar icon, the initial screen will display all the tasks. By default, the task status will be categorized as "Yet to start," "Blocked," or "In Progress."
- Users have the option to click on "Create" to add a new task.
Furthermore, it is possible to filter tasks based on criteria such as task type, status, owner, and duration.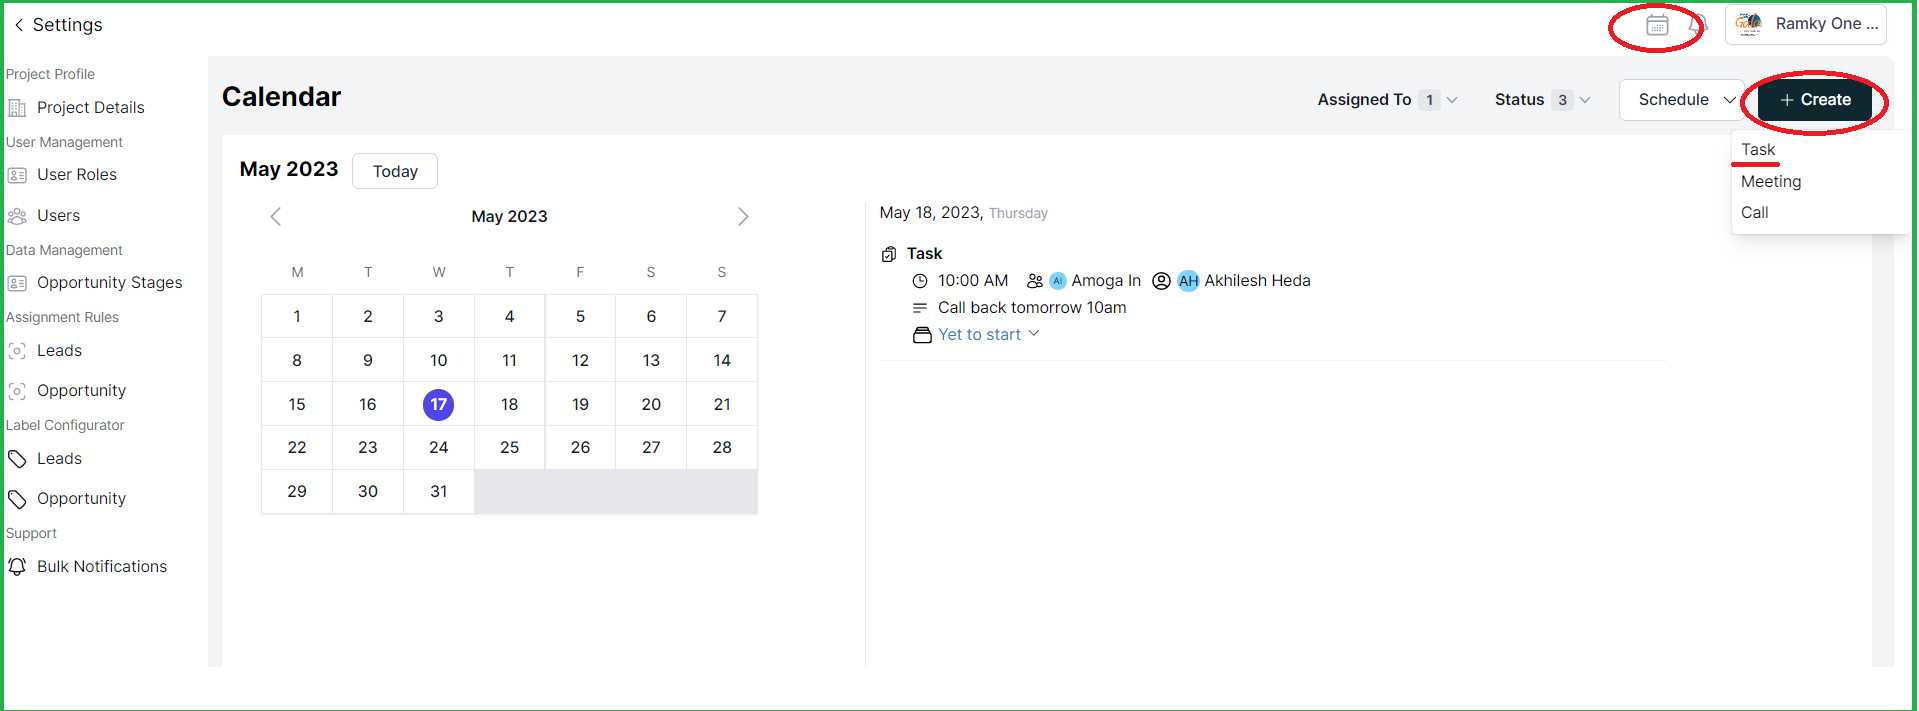
To view your tasks in the calendar, simply switch to the calendar view. In this view, you will be able to see your tasks organized for the day, month, or week. - In the calendar, you have the option to select either the month view or the schedule view to see all the tasks for a specific month.
- Under the month view, you can further filter the tasks to view them for a particular day or week.
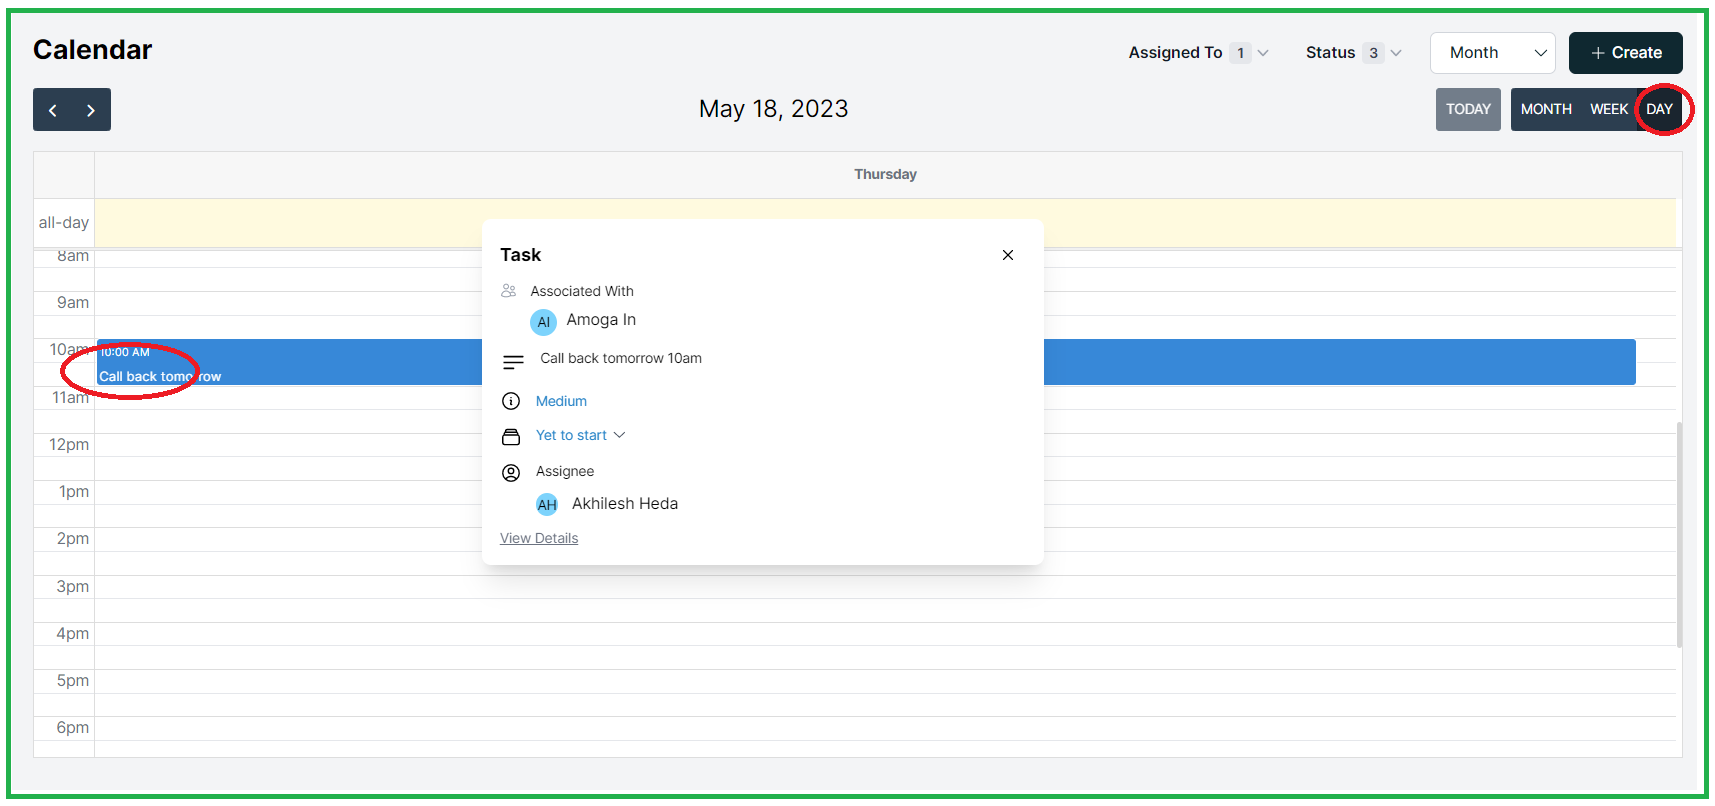
- By clicking on any task in the calendar, you will be able to view basic details of the task.
- These details include information such as the task's association, description, priority, status, and assigned person.
- If you click on the associated name, it will open the lead's profile page.
- Clicking on "view detail" will take you to the task page, where you can post new comments or provide additional updates.

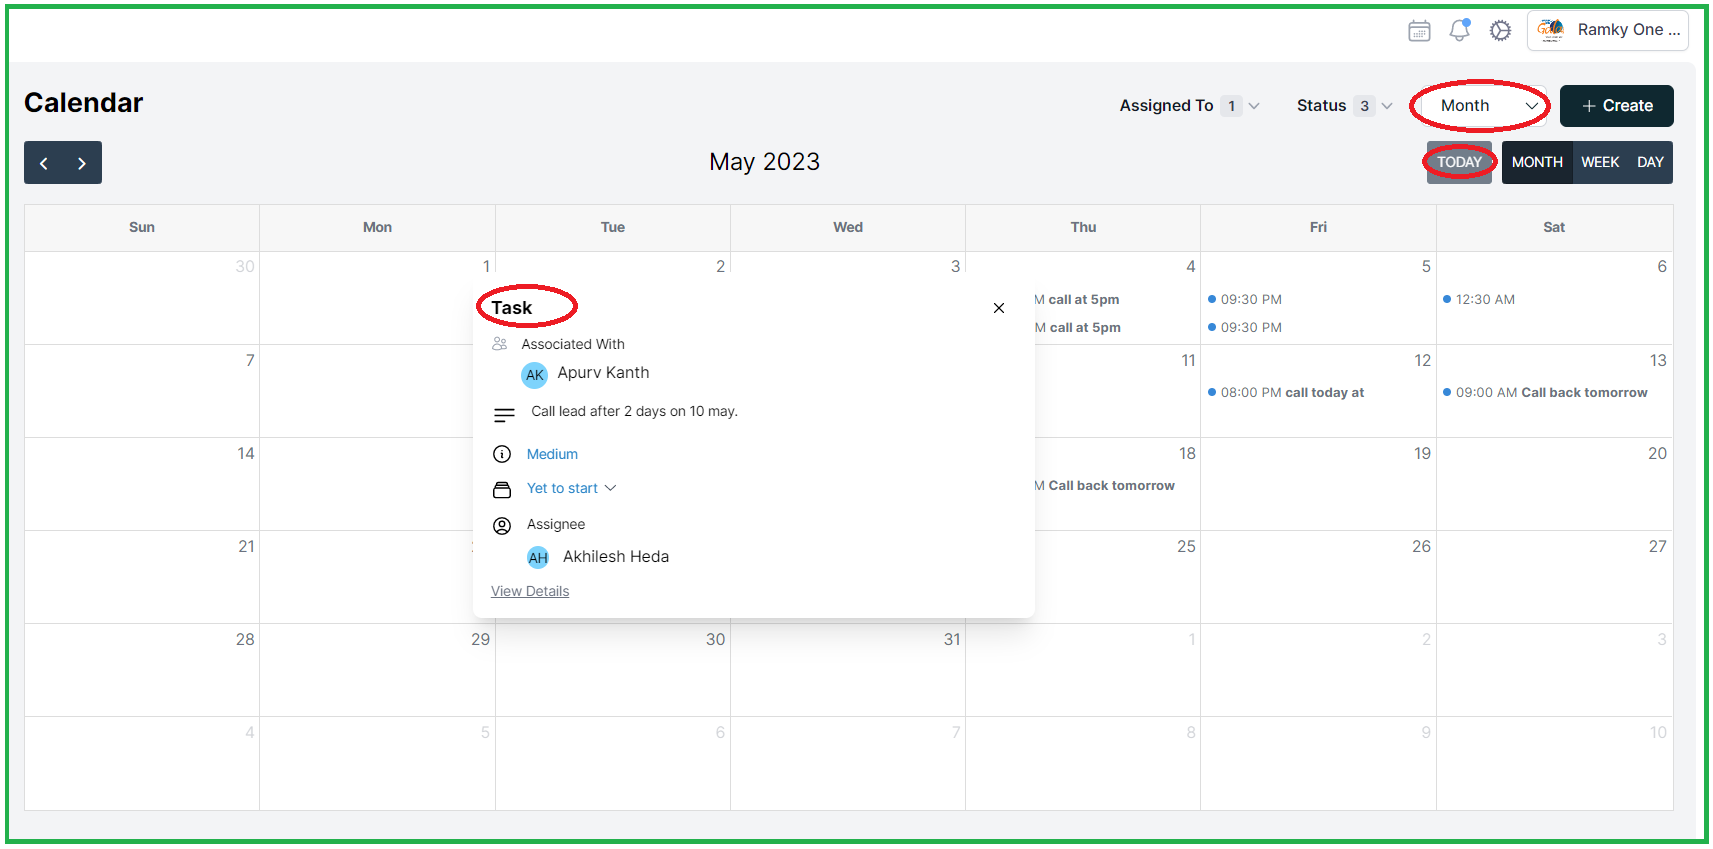
- Shows you the tasks set up for a particular day.
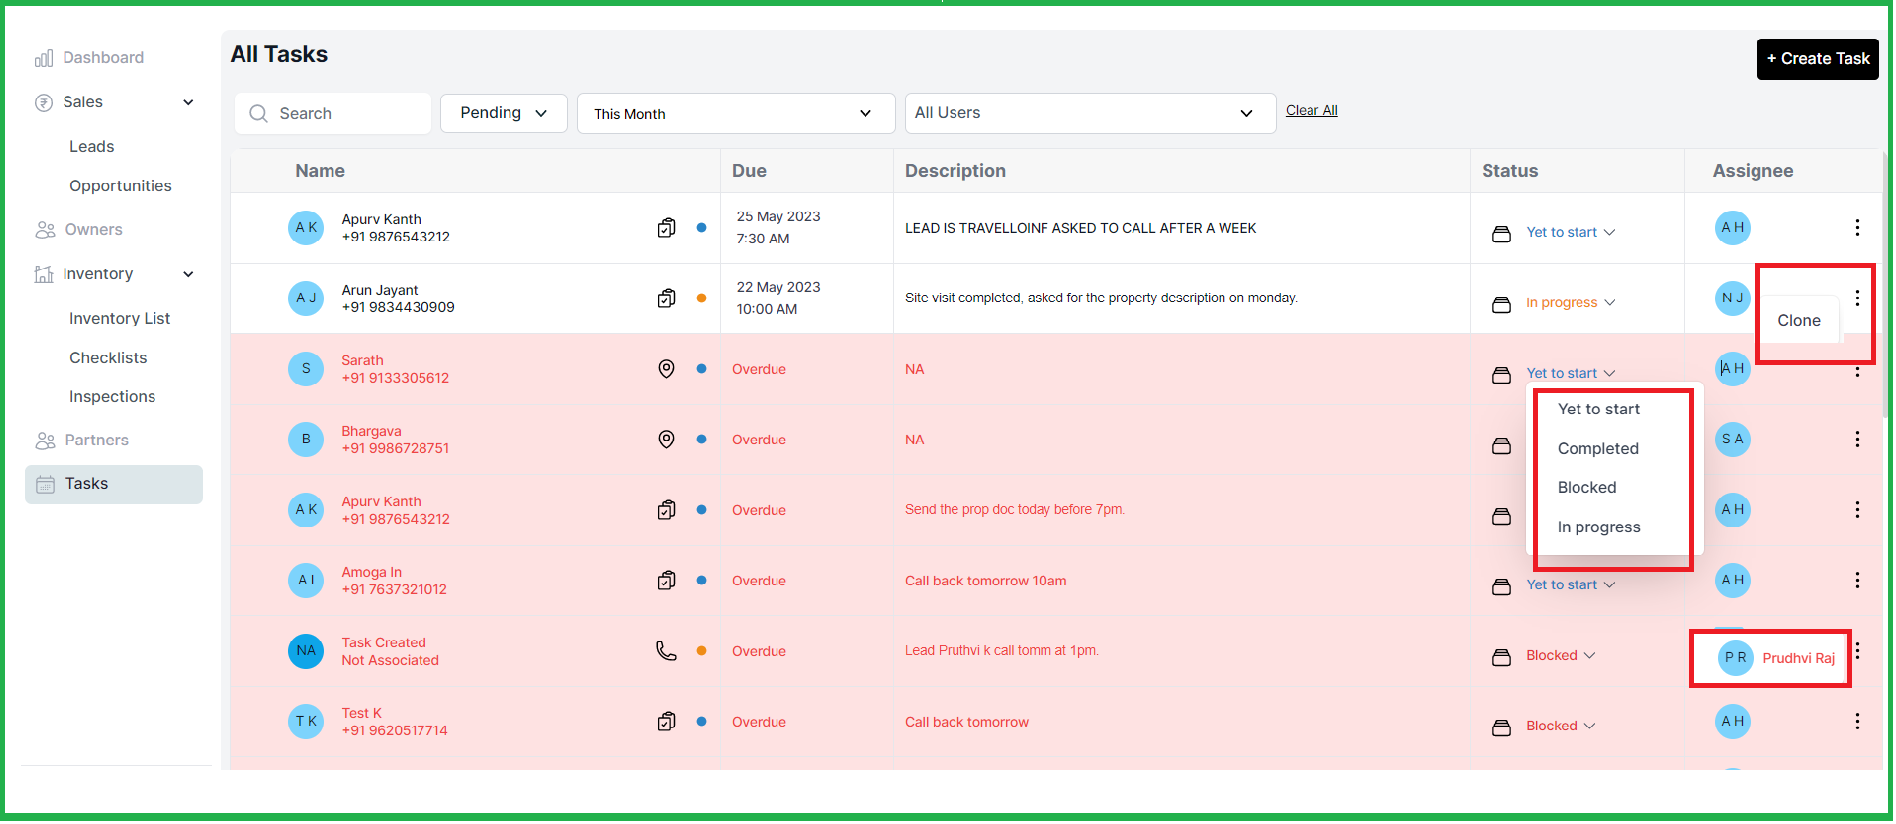
TASKS FROM SIDE BAR NAVIGATION
Separately, From the Tasks tab: The second method involves going to the Tasks module directly and creating a new task from there,
Another method to create tasks is through the side bar navigation.
- By accessing the Tasks tab from the side bar navigation, you can view tasks that are currently in the pending stage for this month, applicable to all users.
- To create a new task from this view, you can utilize the "Create Task" button located on the right side of the page.
- The tasks displayed in the white column are upcoming tasks, while those in red indicate overdue tasks.

4. You have the ability to change the status of all tasks, and if needed, you can clone a task by clicking on the three dots option.
5. And to the check the assignee you can hover over the 3 dots.