Edit Bookings
In this section, we will learn how to adjust booking prices, applying discounts, and managing pricing overrides on the components of a price sheet.
Enable Price & discount Adjustment:
In order to adjust the price in the booking, you should first enable the component of the pricing sheet for Price Adjustment and Discount Adjustment. Below, we will see how to enable the component for Price Adjustment and Discount Apply.
- Click on the 'Settings' on top right beside the Project Name

- Click on ' Pricing Sheet' on the pane left side.
- Select the required 'Pricing Sheet'
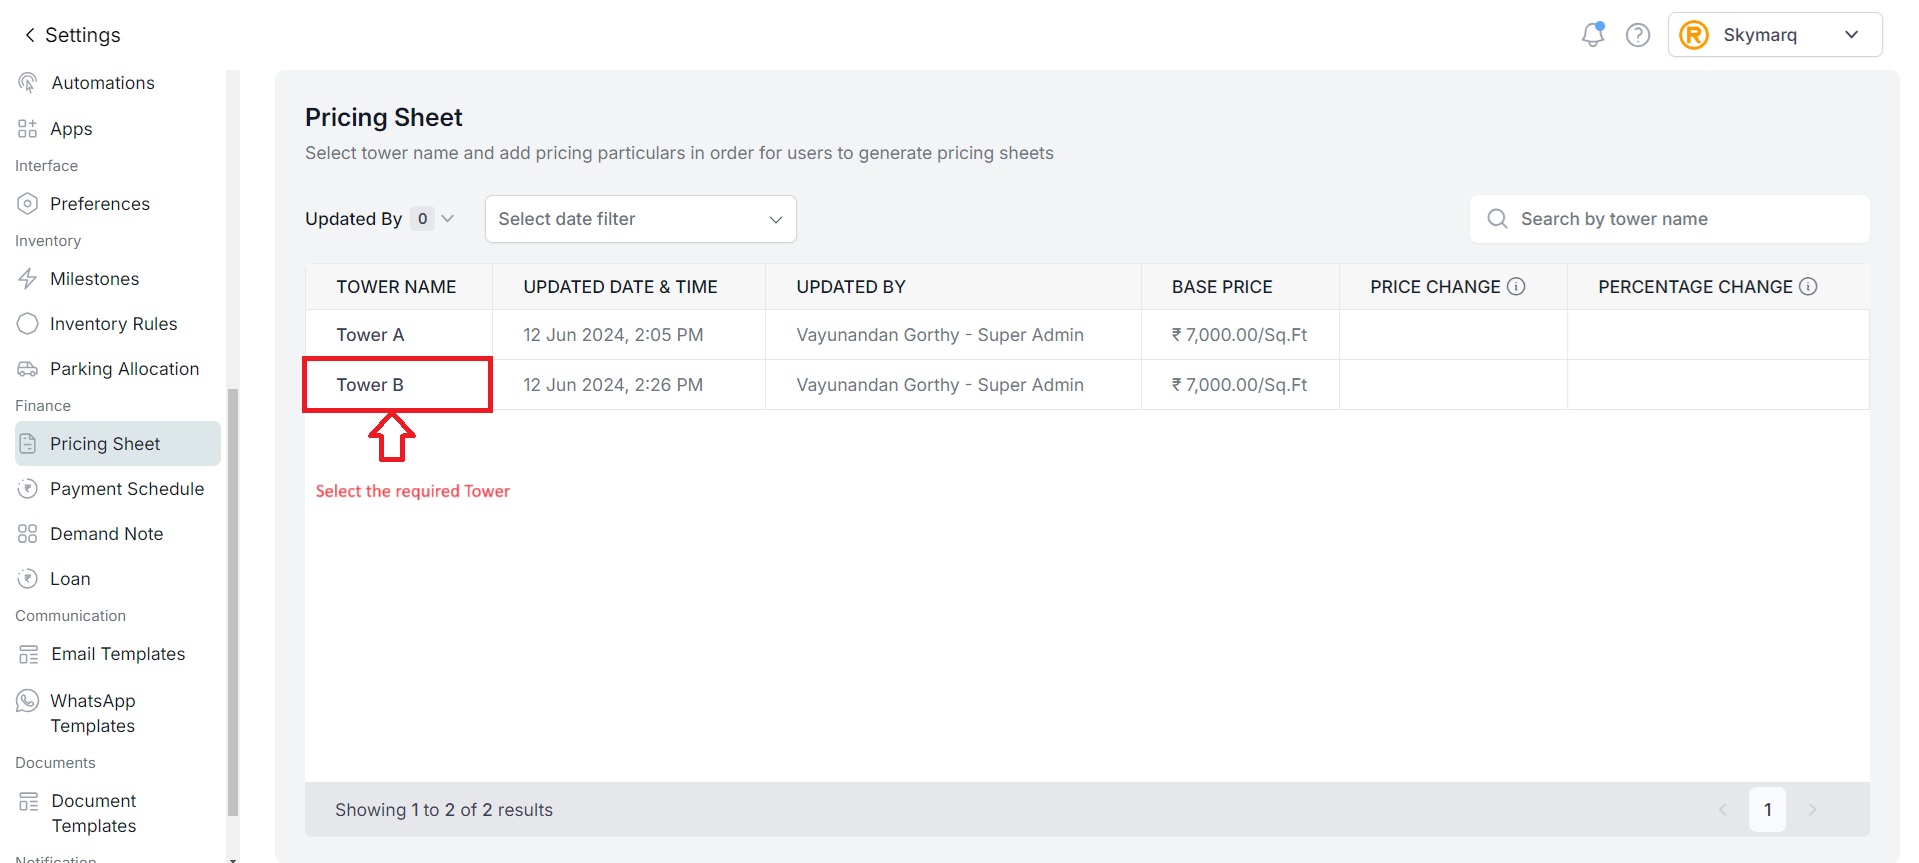
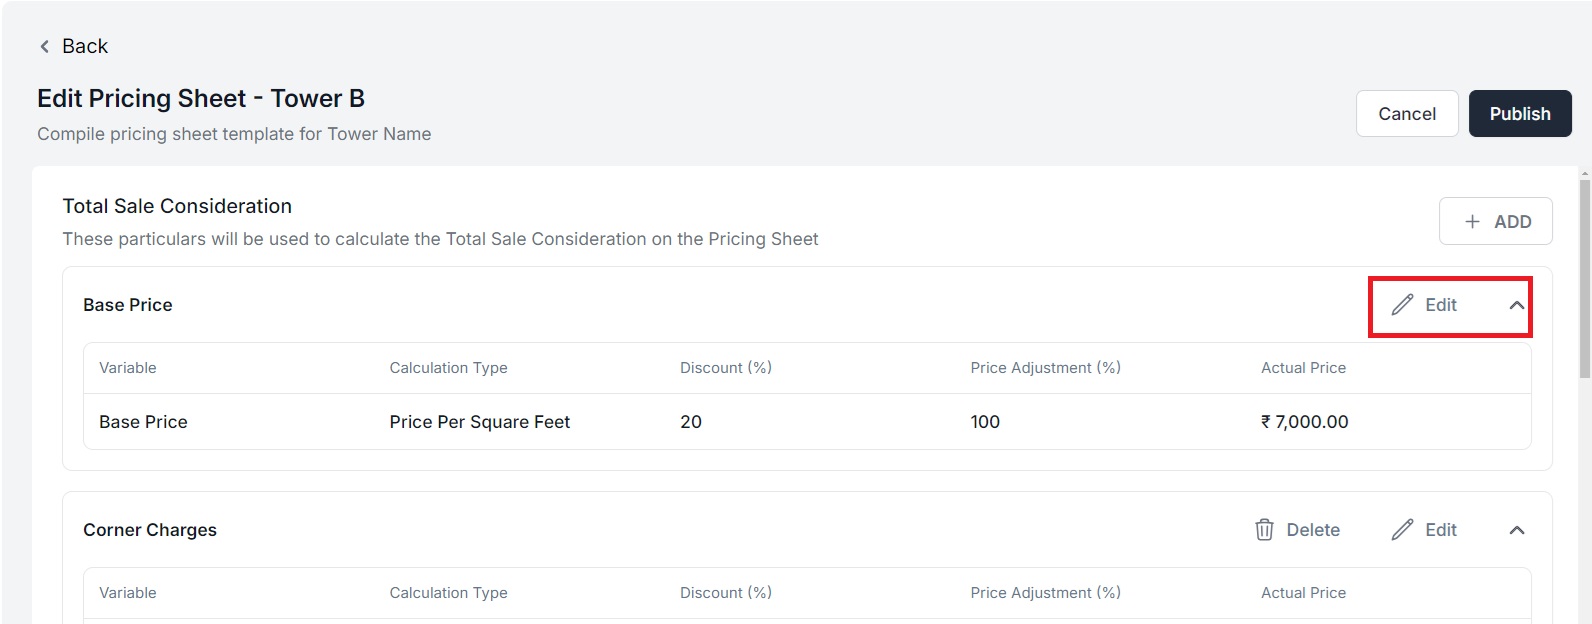
- Click on 'Edit' on top right side of the page to edit the Pricing Sheet.
- Click on the 'Edit' on the right side of each component that you'd like to adjust the price.
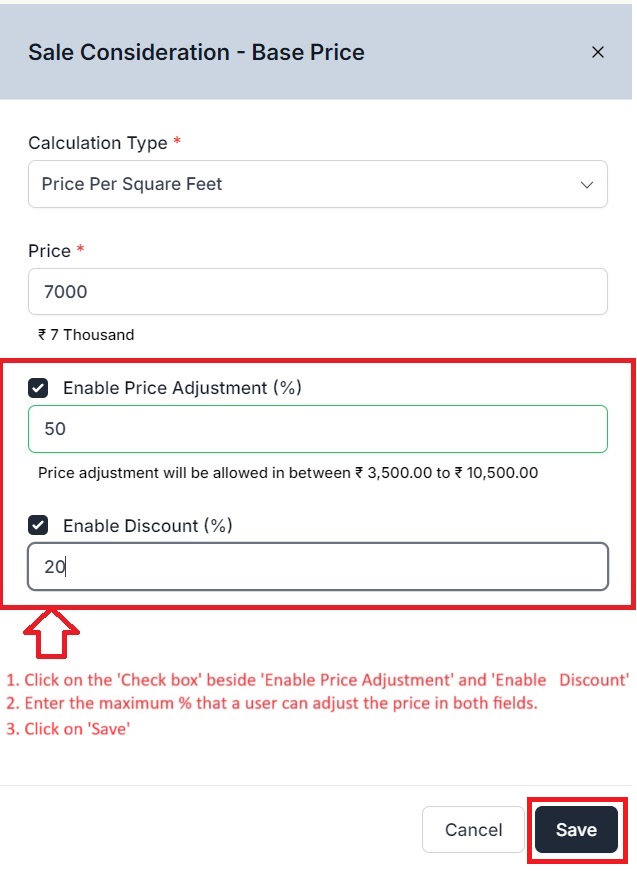
- Click on the 'Check Box' beside 'Enable Price Adjustment' and 'Enable Discount' to enable the adjustment of the price.
- Enter the maximum % that a user can adjust the price in both fields.
- Click on 'Save'.
- Click on 'Publish' on the right side to Finish & Save the settings.
Edit Booking:
Now, Let's see how to edit the price of a booking while creating a new booking.
There are currently two ways to make a booking from ProFlo. Please follow below to more about booking in two ways:
- Booking from Opportunity
- Booking from Inventory.
Booking from Opportunity:
In order to create a booking from Opportunity, you have to convert the lead to 'Won'. Once a lead is converted to 'Won', please follow the steps below:
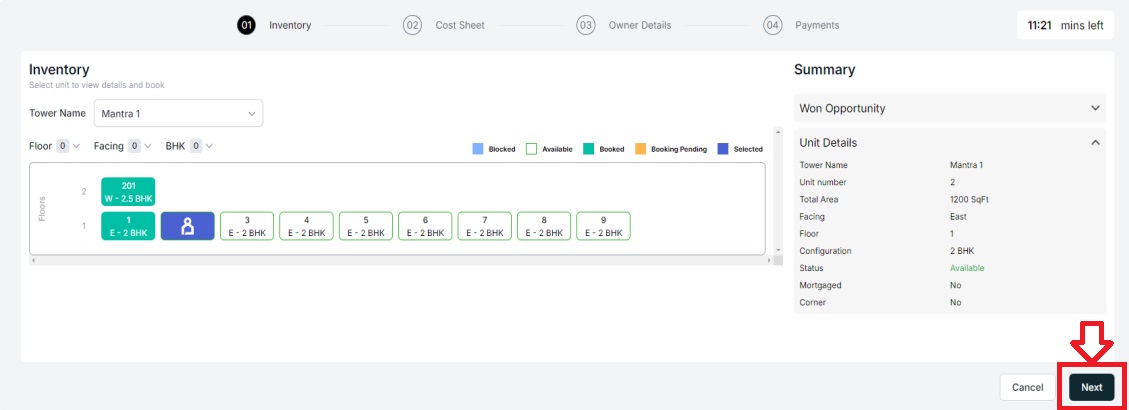
- Open the desired opportunity and click on 'Book' on the lead page.

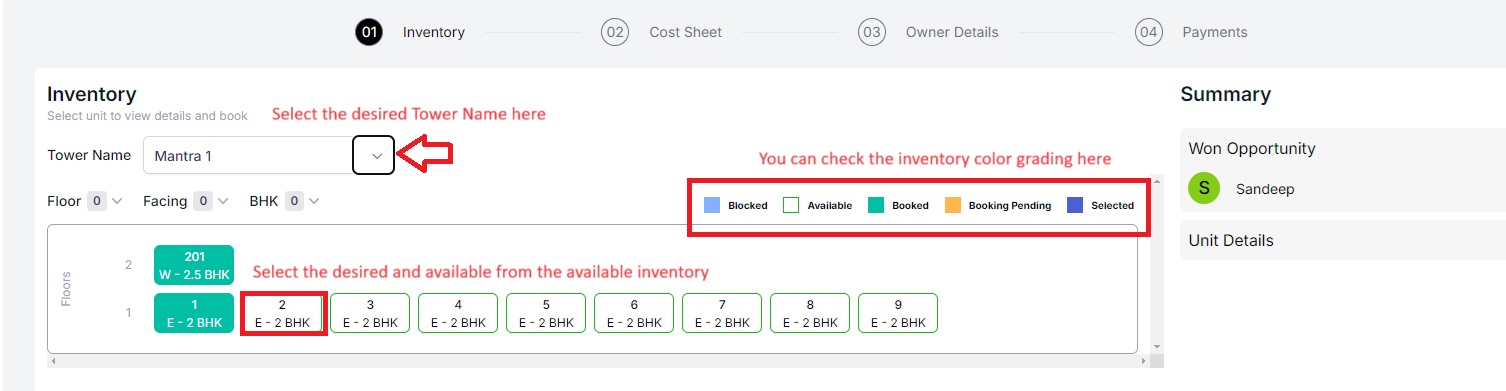
- Select the desired ‘Tower Name’ from the drop-down list.
- Select the desired unit from the available inventory by clicking on the unit number
- You may also view the color grading on to the right specifying the inventory status.
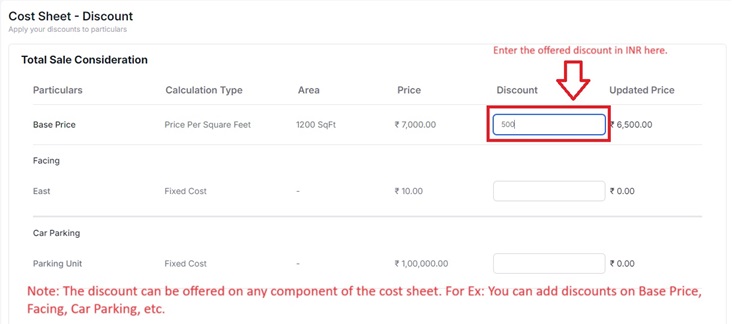
Note: You can restrict the maximum percentage of the discount applied on a Cost Sheet when creating a Cost Sheet. This will restrict the Sales team to limit the discounts on a single unit.
- The Percentage of the discount applied will be displayed on the cost sheet. Please follow the screens below for discounts.
- Screen 1 shows how to add discount for a unit while generating the cost sheet.
- Screen 2 shows the position where the percentage of discount is displayed.
Screen 1
Screen 2

- Scroll down to view and add the ‘Payment Schedule’ based on the milestones created for each Tower.
- Click on ‘Next’

- In Step 3, you have to enter the details of the owner which are mandatory to continue in the booking process.

- In Step 4, please add any payment information made by customer by clicking on ‘Add Payment’.
- If there are no payments made by customer when a booking is made, please skip and click on ‘Book’ to continue booking.

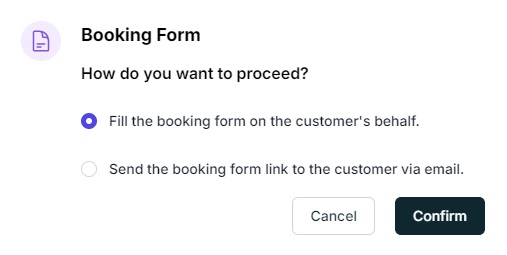
You will then see two options:
- Fill the booking form on customer behalf: This means you will fill the booking form on behalf of the customer. In this case, no confirmation will be sent to customer after filling the form.
- Send the booking form link to customer via email: This means a form link will be sent to customer’s email and customer should complete the booking form from their end.
- Click on ‘Confirm’.
If you have chosen to fill the form on customer behalf, you will be directed to ‘Bookings’ flow where you need to complete booking by filling Agreement Details, Bank Details, Unit Details, Cost Sheet, Proof Payment, Terms and Conditions, and Declaration.